Newborn parenting software - part 3
As noted in the previous post, I decided that the implementation is more appropriate for a microcontroller than a full-fledged computer. While the Arduino is probably the best-known microcontroller, the standard one doesn’t have wifi (the one with wifi is ~$50). The ESP8266, on the other hand, is a microcontroller chip with wifi capabilities, available1 on dev boards like the NodeMCU for about $2 apiece - so I bought a few of them. The ESP8266 is sometimes used as a wifi add-on for Arduino, but it’s quite capable as a microcontroller on its own (and the newer ESP32 is faster).
So what’s the difference between a (very small) computer and a microcontroller? A Raspberry Pi boots off an SD card, usually to a full-fledged Linux operating system; you’d operate it either directly with a monitor and keyboard, or connect remotely using SSH. You can install/create software on it as you would on a “full-size” computer, and I usually do this in Go (although Python is more popular). Conversely, a microcontroller will usually run only one program, which you need to build on a separate computer, connect it over USB to the microcontroller board, and flash it. This has a number of advantages, including simplicity and pretty-much-instant boot.
Coding for the ESP8266 can be done using the same tooling as Arduino - namely, in C++2, on the Arduino IDE. However, during this project I learned of PlatformIO, which is far more comfortable to work with: It’s integrated into VSCode, and git, auto-formatting, autocomplete and VIM keybindings all work nicely. It also provides a more organized approach to unit testing (practically absent in Arduino IDE) and per-project dependency management (you can list what each project needs and have it auto-install). This made the project fun enough for a few iterations.
One quirk of working with the BabyBuddy API is that reporting a diaper change requires supplying the time of change, even if our intention is “right now”. That’s easy enough on a Linux system, but microcontrollers don’t generally have clocks. Thankfully, libraries such as ESPDateTime provide NTP support baked right into your program. At this point, the NodeMCU version worked, and replaced the previous implementation:
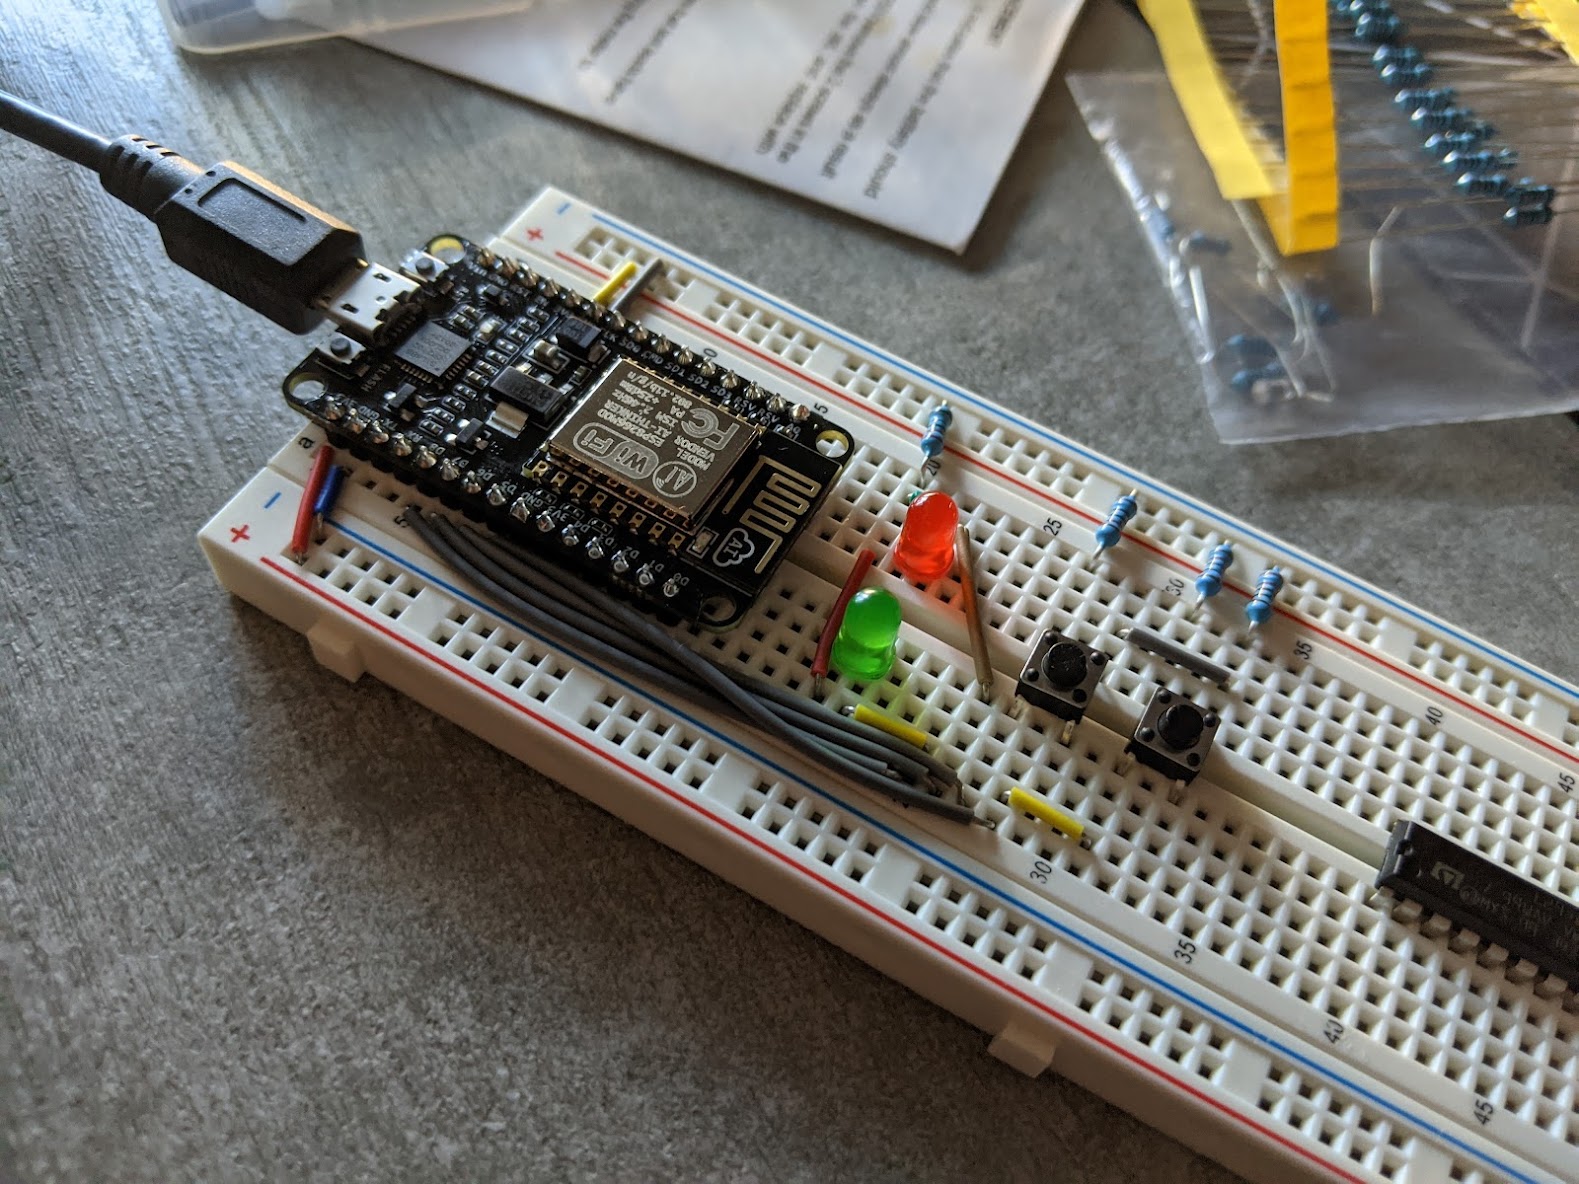
Indeed, this version fits neatly onto a single (full-sized) breadboard. It’s not quite Ben Eater grade, but the NodeMCU is pretty good for breadboard mounting, and using solid-core jumpers let me make it much neater than the previous iteration. However, at this point we realized there was a missing feature: We were never quite sure if we had pressed the button, especially if we were performing a diaper change together3 . A couple of LEDs can only convey so much information.
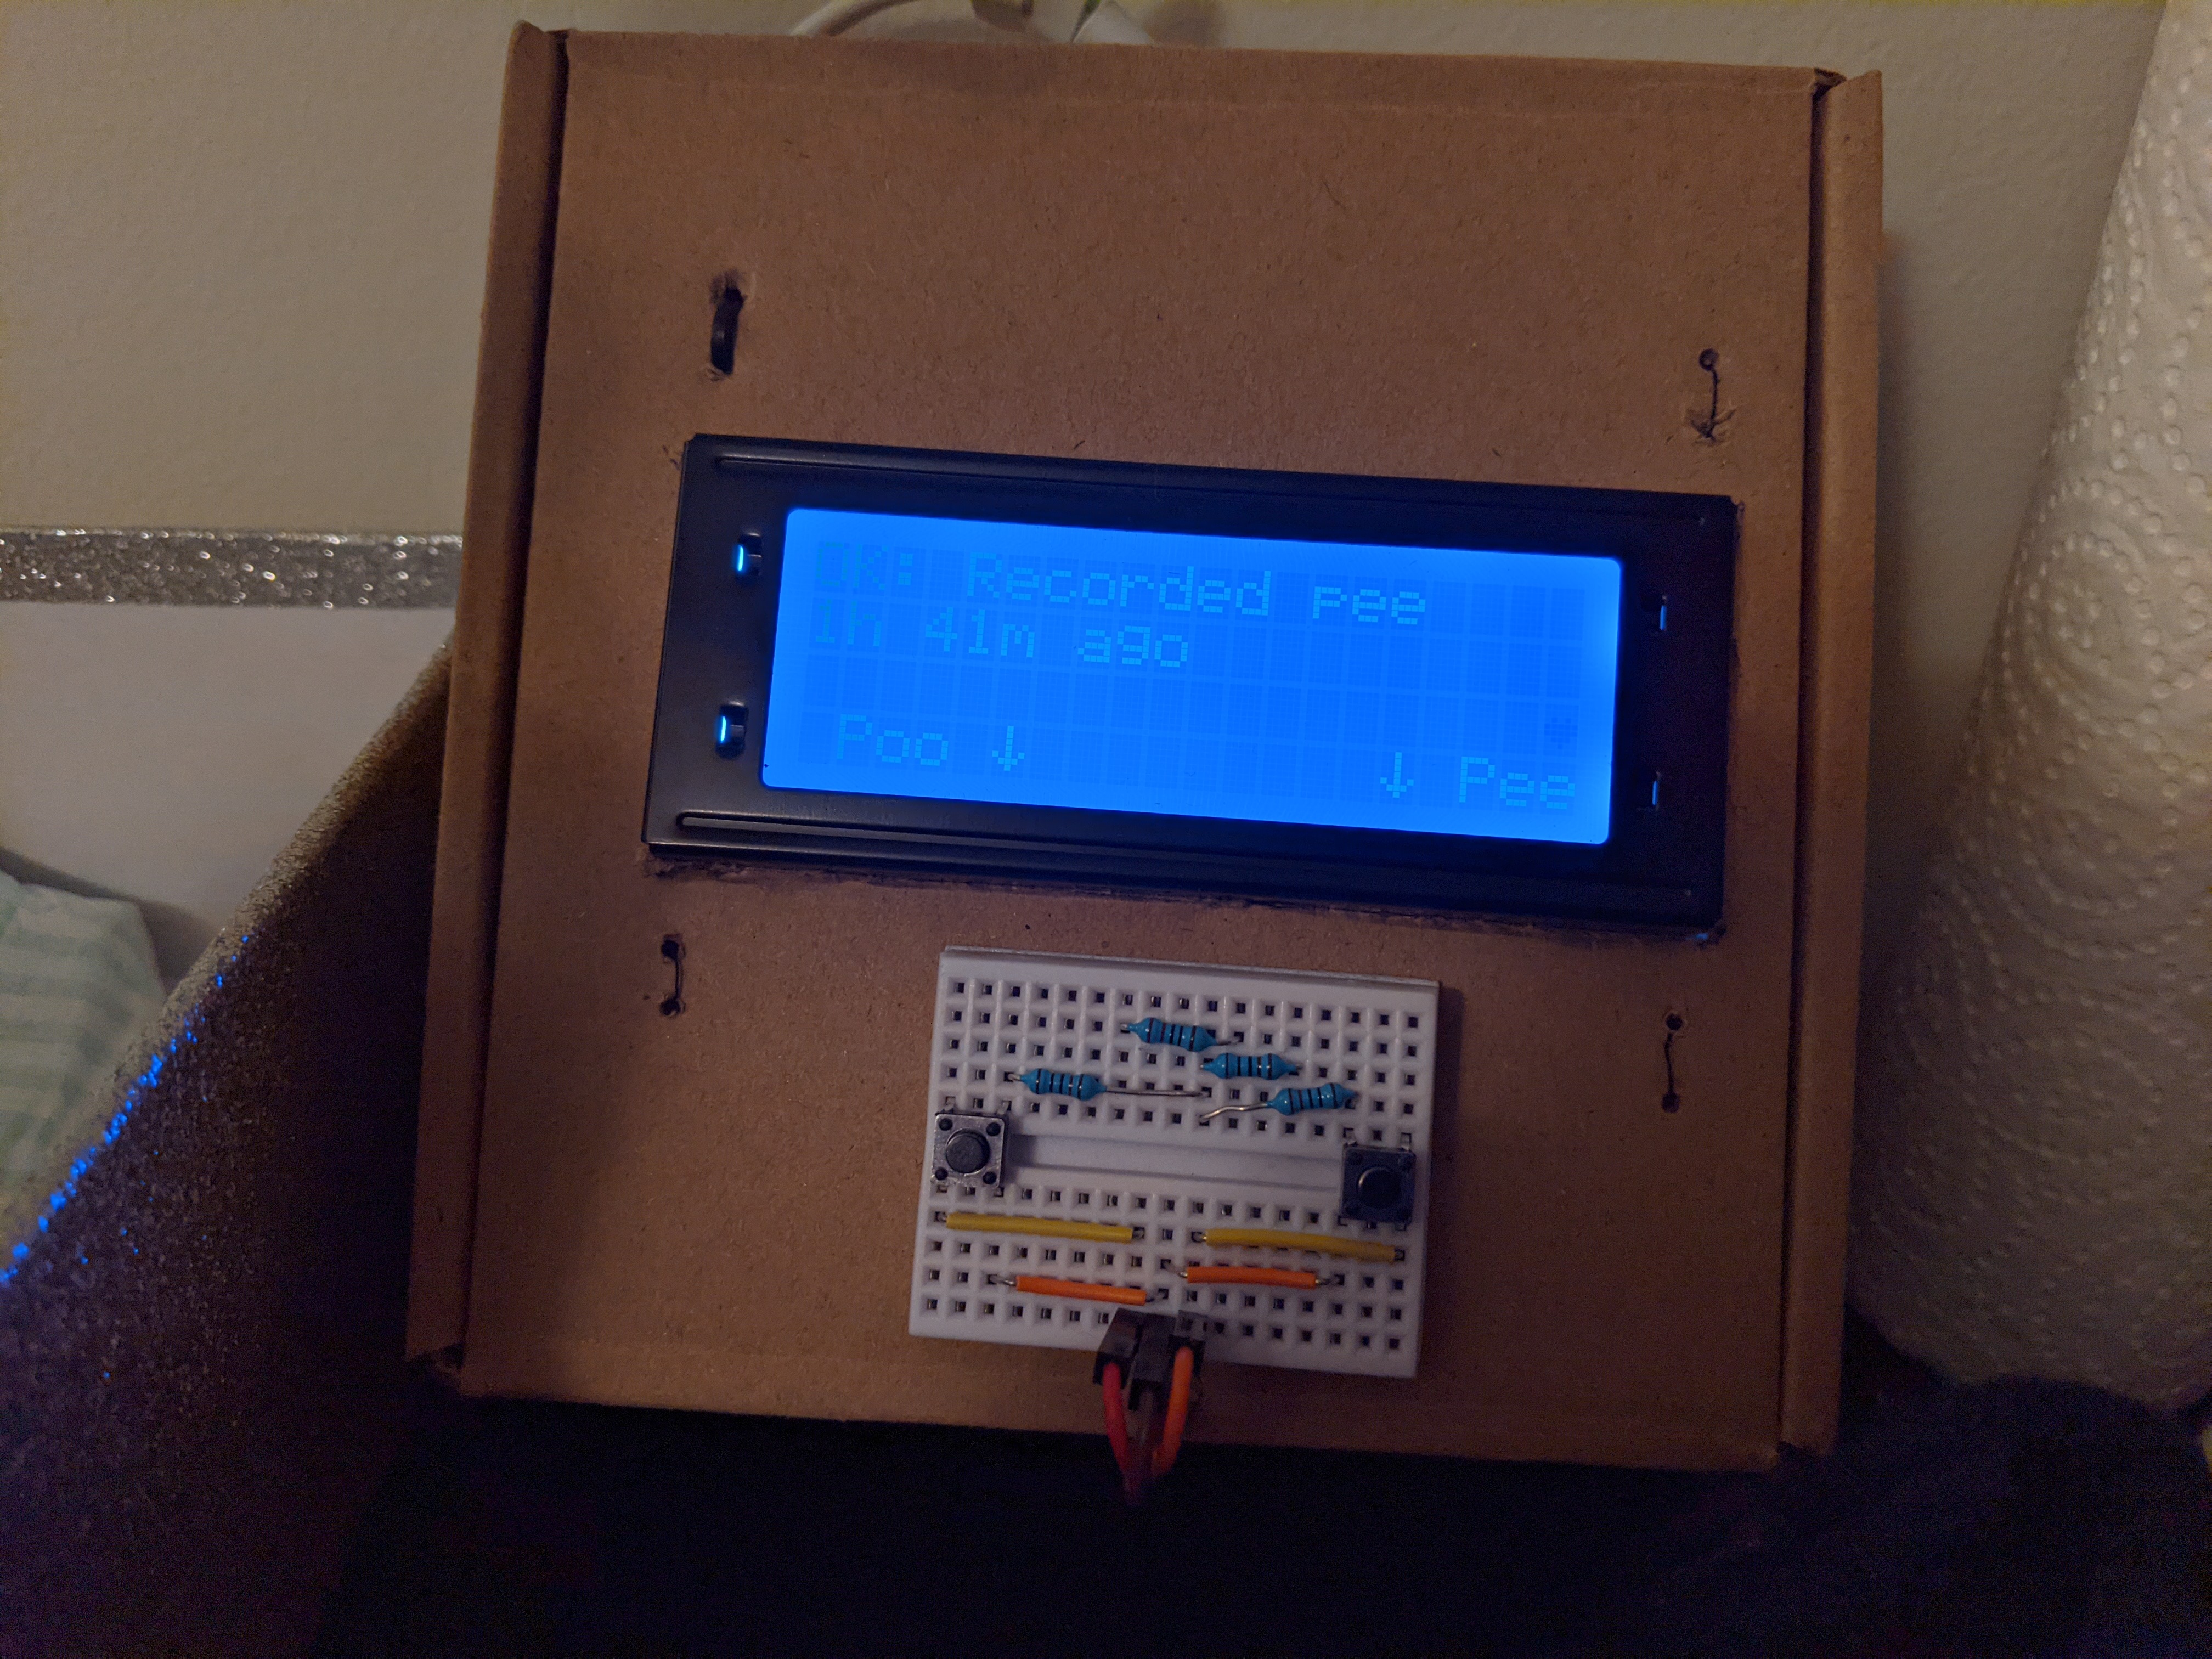
I decided to repurpose my shitty cardboard LCD case for this project. These tactile buttons have quite short feet - they don’t make it through the cardboard, and I insisted on avoiding using a perfboard and soldering iron - as, at the time, I had neither. I ultimately decided to reuse the mini-breadboard from the previous version; like many (all?) breadboards, its bottom is an adhesive pad; I didn’t even bother to remove the resistors from V1, they add a certain design flare to it. With a few iterations on the UI, it was wife-approved: Custom characters are fully supported in C++ (though, not in Go), so I got nice labels for the tactile buttons, as well as a heartbeat4 to indicate that NTP is still working.
Overall, the project has been a blast, and the result is everyday-useful. Working on it has made me realize how much I need my own space for late-night electronics projects, but that’s a project for another day.
Actually available - as in, as opposed to Raspberry Pi 0w, they’re in stock in many places at the moment. ↩︎
Unfortunately, TinyGo does not yet support wifi. ↩︎
2nd row from the bottom, rightmost column; you can see it fading out in this shot. It blinks every second. Although the photo doesn’t show it, the LCD’s contrast is actually great in-person. ↩︎