WFH Wifi
2020 being what it is, I’ve been working from home for quite a while. We decided to convert our spare bedroom into a home office, and I realized how nice it is to have a proper desk at home, even for non-work stuff (I haven’t had one in over 10 years!). That being said, wifi is a challenge with the apartment’s structure.
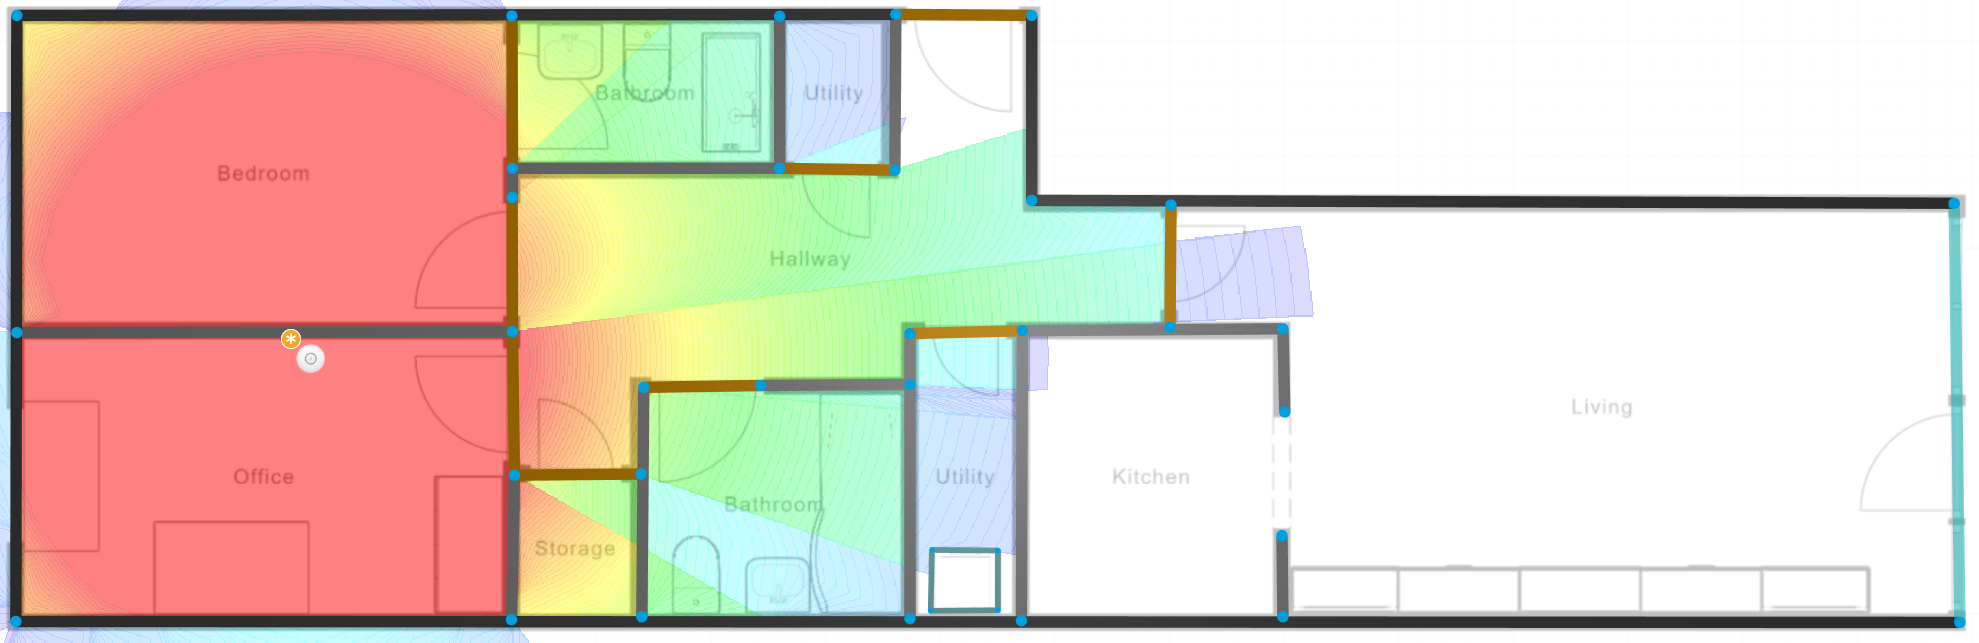
(Diagram below is approximate; I’ll explain why and how it was created in a bit.)
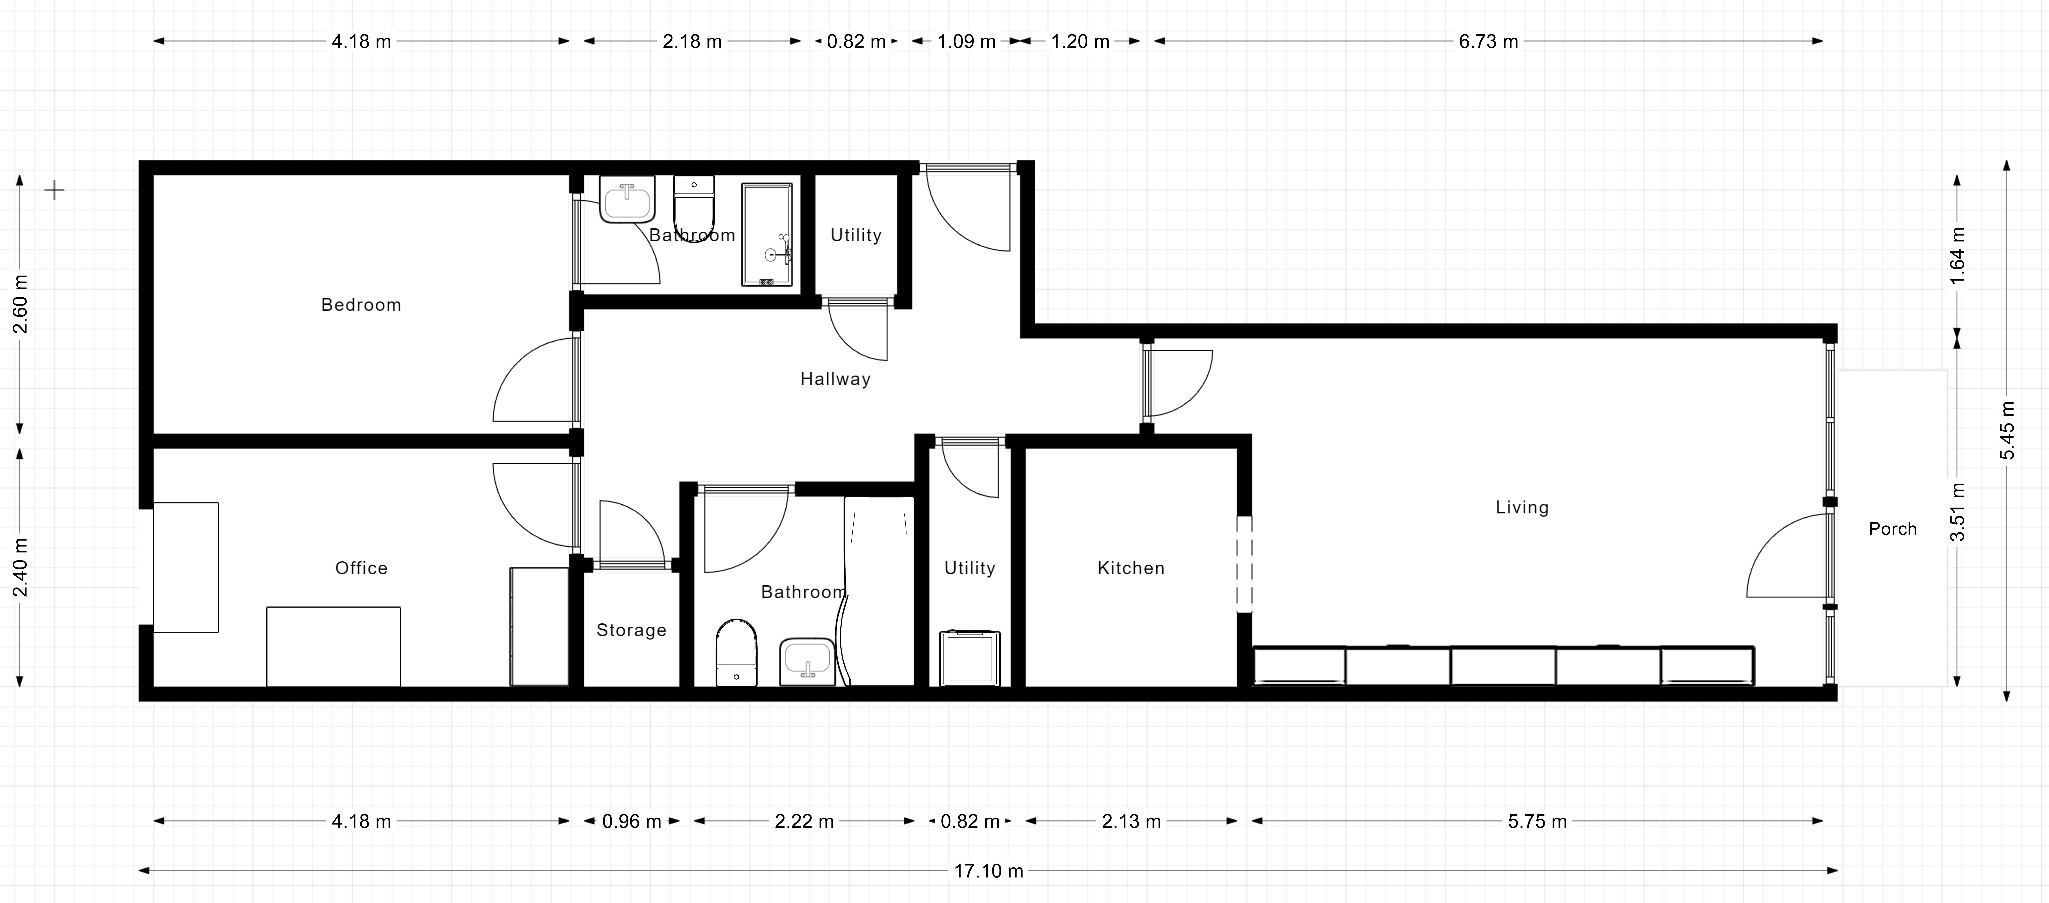
My broadband comes in via a cable connection in the living room - the modem and router/AP sit in the bottom middle of the room. Before WFH times we would occasionally work from home, mostly from the living room, which was the only place with chairs. To get wifi in the bedrooms (one of which is now labeled “office”), I used a TP-link powerline pack - i.e. one thing stuck to a power socket by the router in the living room, and another in the bedroom. Or the hallway. The tradeoffs were these:
- We wanted to have it as close to the bedroom as possible, so we’d have good reception there.
- Having it in the bedroom let us hard-wire the TV to it.
- It’d have better performance the closer it was to the living room. While I’m not sure what the electrical topology of my apartment is, the further from the living room it got, the worse its “reception” got - i.e. the slower and less reliable its communication with the one in the living room would be.
So for the most part, it worked. We’d get the odd disconnections or slowness, but it was used mostly on our phones, so we could switch wifi off (or, better yet, just go to sleep or get out of bed). There was one annoying issue though - roaming never worked right.
- Giving the powerline wifi network a different name worked OK, but we’d have to manually switch networks; especially on my partner’s iPhone, which tends to be “sticky” (and requires more taps to switch wifi networks to boot).
- Giving the powerline wifi network the same name (SSID) and password worked OK for roaming most of the time, but not always - and now it was quite difficult to tell, when a problem occurred, if it was due to our phones looking for the wrong AP; turning wifi off and on again didn’t always fix this.
Working from home, connectivity suddenly became important. We have a ton of video meetings, we’re using our laptops all day, and sometimes we need to move around quickly - we can’t both have meetings in the home office, so one of us needs to switch to the living room table and have the connection work with minimal extra fiddling.
I decided two get a two-pack of Nest Wifi devices (a Router and a Point). Over time, I found a third one was necessary, and still doesn’t always work quite right. Unfortunately, running ethernet to the home office isn’t currently a possibility (…but should definitely be a priority for any renovation). After some messing around, I came up with a solution, but figured I’d try and understand if I can do better by analyzing the apartment.
So, step 1 - I needed a floor plan. I do not have one of my apartment, but the 3D visualization the realtor provided was still up and had a “measurement” tool. So I went to http://floorplanner.com and used that visualization to sketch up the diagram above. The point of this was the next step: In a wonderful company-internal talk about home wifi (this is a common issue in Israel, where many apartments have concrete-walled shelters), the neat mapping capability of Unifi’s controller software was shown. While I don’t own any Unifi gear, I installed the controller software (available as a neat docker container), imported my diagram, drew the walls, and positioned my living room router.
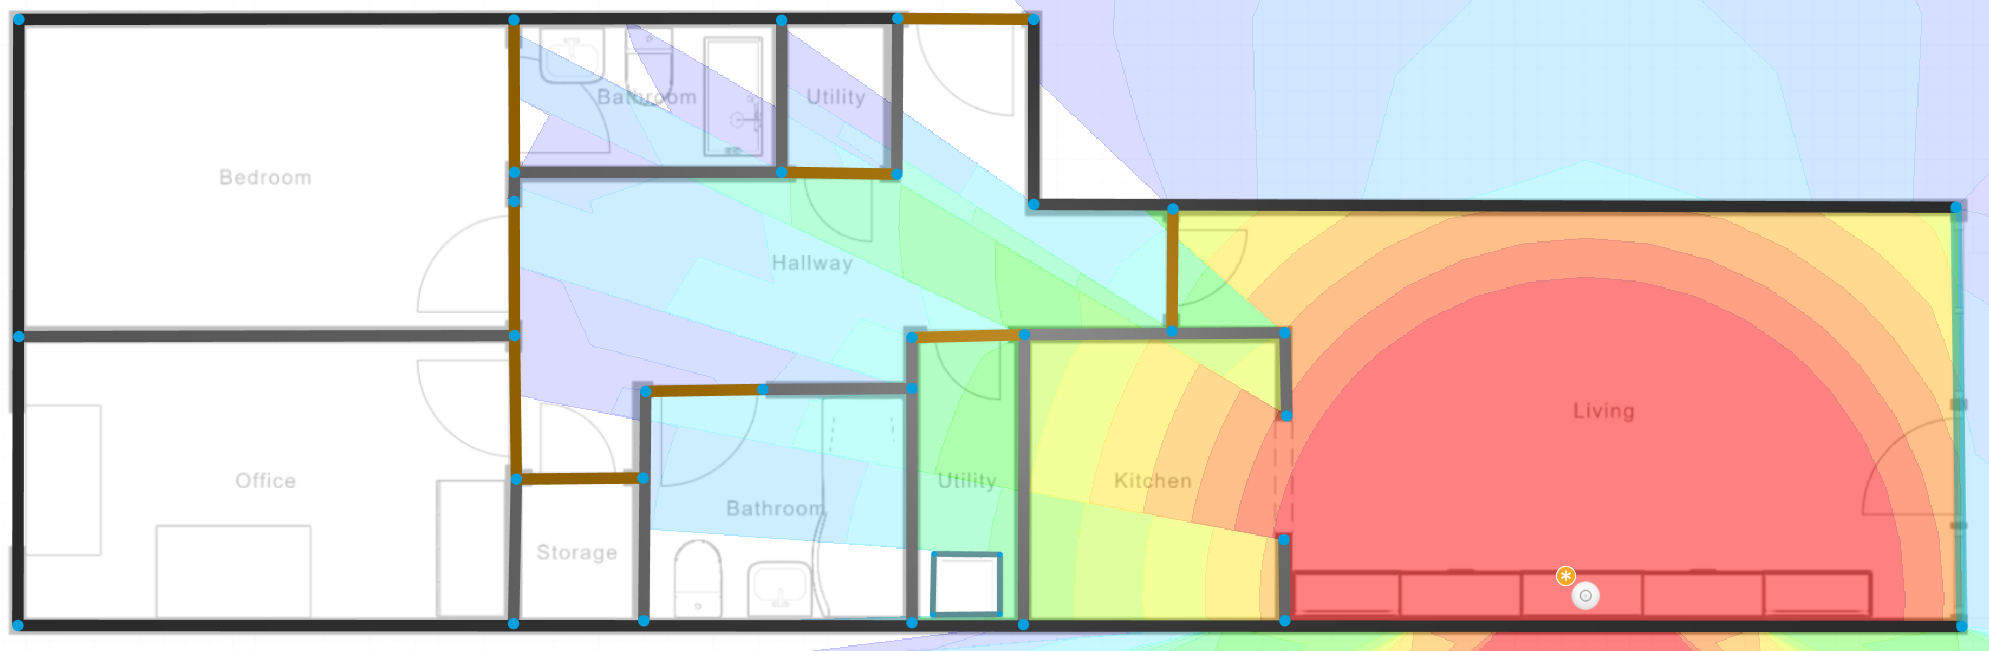
This is, naturally, only an estimate; the AP model is wrong, the -64dBm client sensitivity is just a guess, as are the wall widths and materials; reflections also aren’t taken into account (and I suspect the Nest Wifi is making good use of those). The washing machine and dryer in the utility room are modeled as a steel box, perhaps overestimating their attenuation. This is the diagram for 2.4ghz - things are naturally worse in 5ghz:

The spot we naturally chose for the point was the hallway (the utility room now seems like it would’ve worked better for reception, but it’s often quite damp and has no free power sockets anyway). Indeed, the Google Wifi app (which you still use for Nest Wifi) would say that the connection between it and the living room is “Great” (and that’s as much detail as you’ll get). But the reception in the office would still be pretty bad, sometimes leading to disconnections.
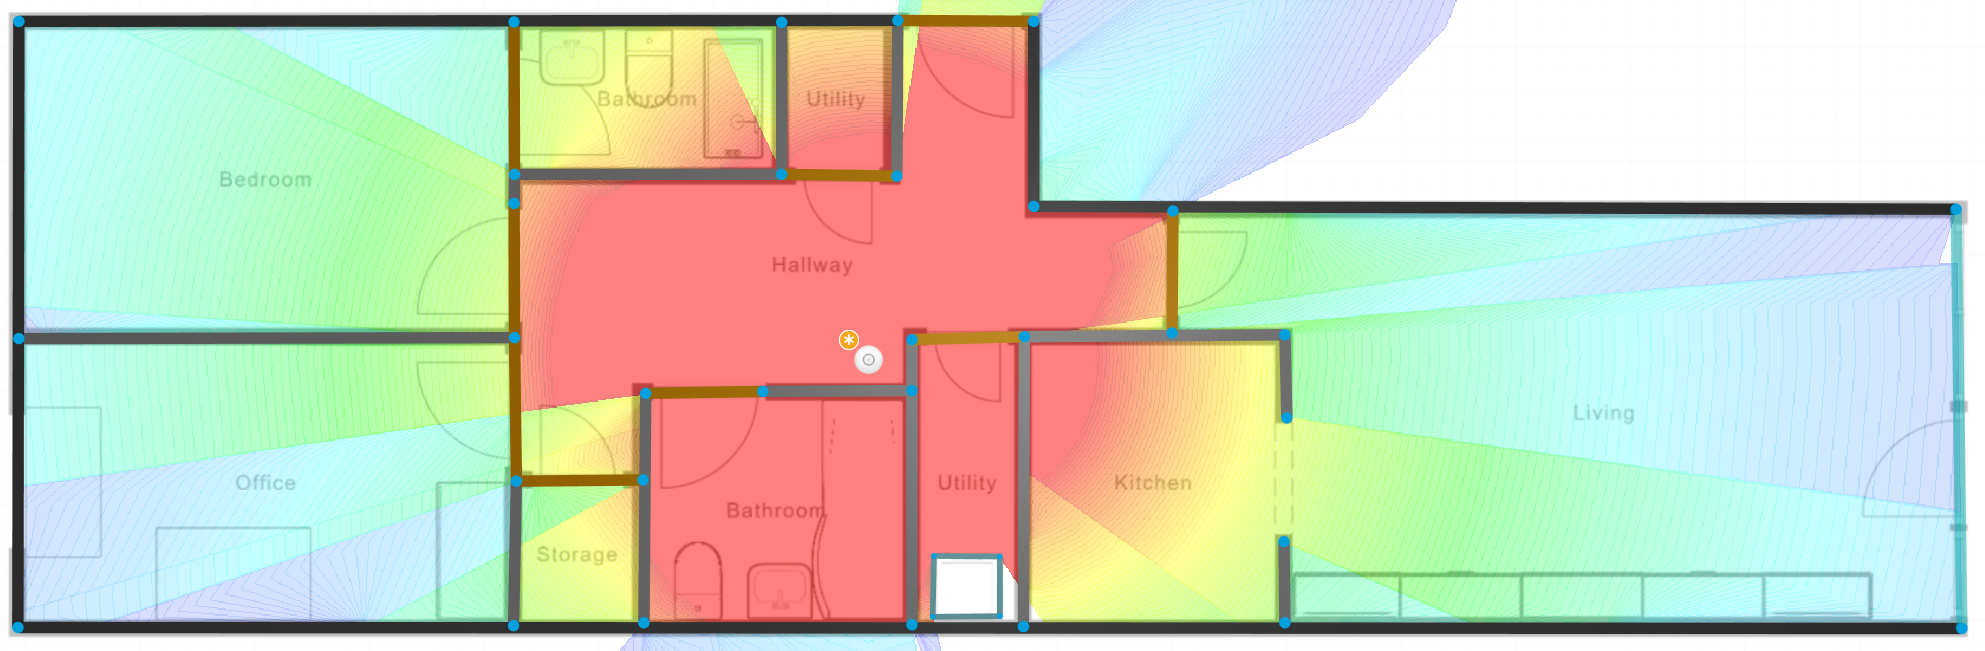
I suspect the issue here might be that 5ghz connectivity is just barely available:
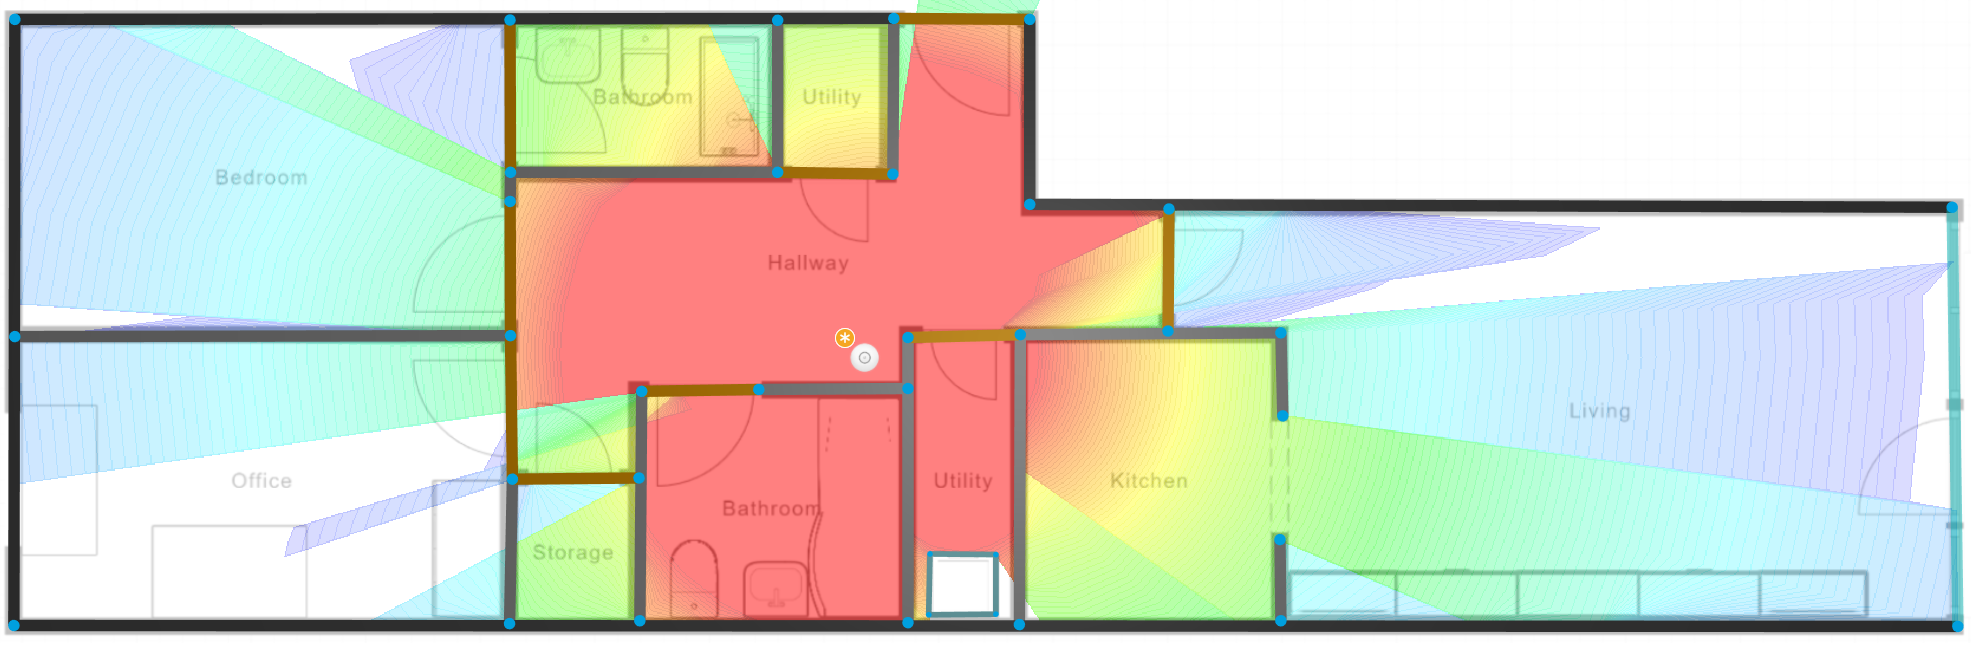
At any rate, I decided to throw some more money at the problem, adding a 2nd Point in the office:
There is now most certainly a strong connection between the office point and the hallway point (as well as the laptops in the office), and the hallway point has a good connection with the living room. However, as it turned out, the mesh test did not consistently give me good results - sometimes I would just get “poor” results. I suspect the issue is the dynamic nature of… doors.
We tend to get quite loud in meetings, so when we have them, we close the office and living room doors - represented here as wooden walls. It seems that, when the doors are open, the office point could still just barely communicate with the router in the living room. It turns out that Nest does all it can to avoid daisy-chaining, so the office point would connect to the living room router if it could see it. Closing the doors would make that connection worse, but it’d take the network some time to reconfigure. However, rebooting the system with all doors closed got a “great mesh” (presumably daisy-chained, though this can’t be seen from the app). That meant that my wifi-signal depended on the particular state of the doors when the mesh network last decided to self-optimize.
The solution I came up with was to move the point from the office to the bedroom (…where nobody is during the work day), and make sure that door stays open:

I now have no idea if the network is daisy-chained or not, but it has been working consistently well… even at night when I stay up writing stuff like this blog post, and the bedroom door is closed.
I’d really want to get some CAT7 around the apartment, but for now - this works. Hopefully these tools and methods can help you out as well.